Starting with photo editing software: which, how and tips
When you start taking photos, you’ll quickly realize how challenging it can be to capture that perfect shot without editing the photo. You simply see so much more on a large screen compared to a tiny camera display. Therefore, in this article, we’ll provide several tips for those looking to start with photo editing software.
There are always aspects you can control when taking photos. If you’re shooting outdoors, you don’t have complete control over the lighting and contrasts. That’s where photo editing can be used to enhance the quality of your shots. It’s also a valuable tool if you’re taking a series of photos at an event. You’d naturally want all your photos to have a similar ambiance. If that doesn’t happen naturally, photo editing can ensure consistency across the photos you’ve taken. Photo editing is a skill you have to develop. And if you think you can’t do it, you’re mistaken. With the right tips and enough practice, you’ll be editing photos like a pro in no time.
Start with Simple Software
There’s a vast array of software available for photo editing. Each program has its unique fundamentals. Some are easier than others, and some offer more features. The most crucial factor is to select a program you find intuitive. Your choice also depends on the extent of editing you’re aiming for. For minor tweaks, a tool like Canva might suffice. But for intricate edits, you might need software like Adobe Photoshop.
Start with the Basics
As you get familiar with the photo editing tools, you can undoubtedly start creating complex edits. However, it’s best to thoroughly understand your chosen software first. Begin with basic tasks like adjusting the composition by cropping and straightening. Experiment with contrasts and brightness and see how to achieve the desired result. Color correction can also be very handy and isn’t too complex to start with.
This allows you to achieve a more natural effect in your image. Remove minor imperfections through retouching. Most importantly, keep experimenting. You can always undo changes. Ensure you save a copy of the original so you never lose it in case something goes wrong in the program. Above all, it comes down to practice, practice, and more practice.
Five Basic Principles of Photo Editing
Whether you’re editing on your phone using a free app or with professional paid software on your desktop, there are basic principles to guide your edits.
Cropping
By reframing your photo or altering its composition, you can entirely change its narrative. For instance, you can highlight a specific subject by positioning it along the lines of the rules of third. Adjusting your frame also helps remove any distracting elements from the image.
Brightness and Contrast
Adding contrast can make objects pop, but it primarily helps achieve the correct lighting for the photo. Use the brightness and contrast sliders to adjust the overall exposure. When doing this, you’re essentially tweaking the shadows and highlights.

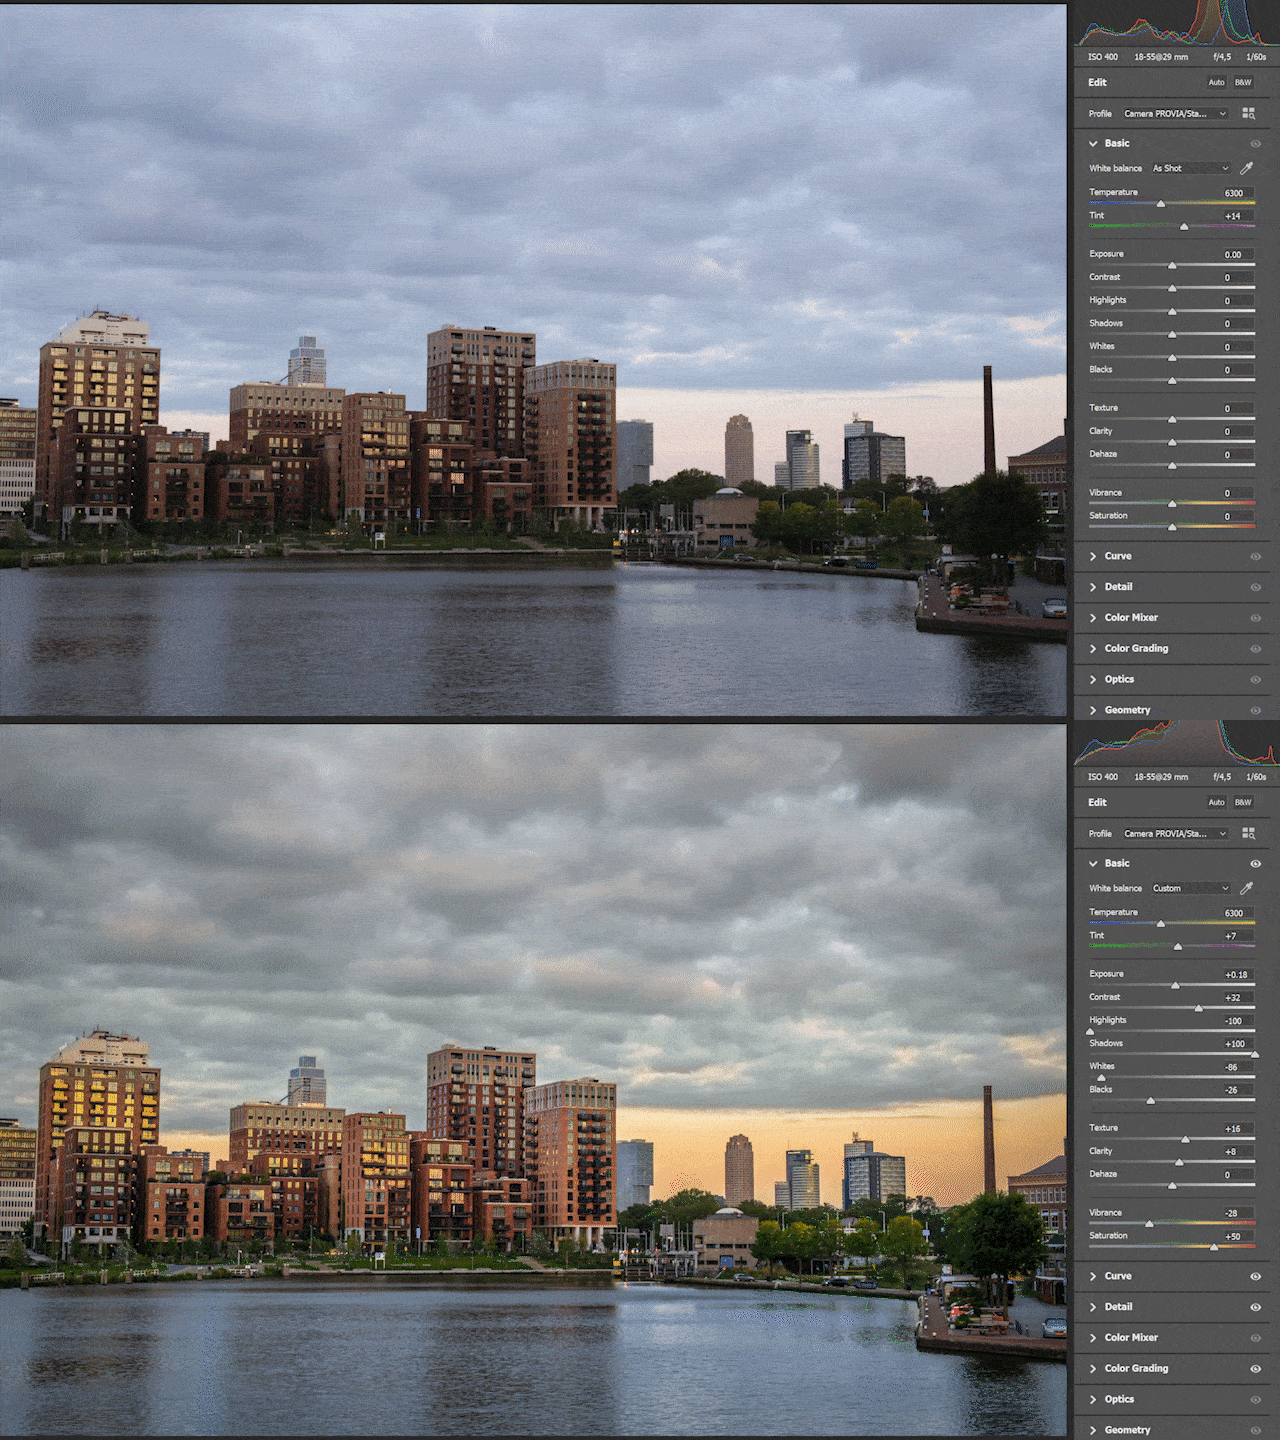
Standard sliders from Adobe Photoshop (Camera RAW). You’ll encounter these in most (free) software. Options like ‘Texture’, ‘Clarity’, and ‘Dehaze’ might be labeled as ‘Premium’ in certain programs. Photo: Adobe / Camera Deals
Color and White Balance
While color balance deals with your photo’s color harmony, white balance controls the warmth. You can use white balance to make the photo feel cooler (bluish) or warmer (yellowish). With color balance, you can adjust the saturation of the entire image or individual colors.
Filters
Using filters isn’t taboo; even professionals use them. There are filters like ‘vintage’ or ‘high contrast’ that instantly provide a specific effect. You can then fine-tune this effect using other editing tools, crafting your unique style. The way the photo is edited doesn’t matter much, as long as the final result is visually appealing.
Resizing
Resizing the photo (or not) is essential for various reasons. You’d need a large photo, say 6000 pixels, if you intend to print it in a large format. However, if you’re using the image for social media, it’s better to reduce its size before transferring it to your phone. Large photos occupy more space, and the extra pixels won’t be visible on a smartphone screen. If you have multiple images you need to resize quickly, you can use Bulk Resize Photos.
Handy Tips for Photo Editing
Now you know the aspects to watch out for, but what exactly do you do with them?
Make minor adjustments
When you adjust contrast, color, highlight, shadow, white, black, and the exposure button, make small changes. This way, you can see the photo slowly transform and remember the steps you’ve taken. If you suddenly change settings by minus or plus 80%, the photo may look bad, and you won’t know where it went wrong.
Use grids
When reframing an image, utilize grid tools. Think of the Golden Ratio or the Rule of Thirds. By positioning the subject of the image in the right spot, attention is automatically drawn to the subject.

Grid with the rule of thirds. Photo: Yoreh Schipper / Camera Deals
Pay attention to colors
Adding extra color can bring a photo to life. However, make sure not to overdo it. Too much color can also make the image less credible, especially when taking pictures of everyday life. People know what it can look like in reality, so exaggeration is pointless. Removing colors can make a particular subject stand out, but it can also make the photo look flat. Experiment with each image.
If possible, use RAW images
If the software (and your camera) supports RAW images, use them for editing. A RAW (raw) image is the uncompressed version of the photo. A JPEG has been compressed and is therefore smaller in file size. In a RAW image, you have more color, contrast, and exposure information at your disposal. This means you can lower the highlights of a RAW photo by up to 100% without the photo being underexposed, whereas with a JPG photo, you can already have underexposure at -25%. This is because the JPEG is already compressed, and the extra information has been lost.
In the example below, you can see the difference between using minus and plus 100% of highlights and shadows and the effect on the photo.
As you can see, the JPG image performs well, and no strange contrasts or colors arise. However, this only works if you use top-quality JPGs with a larger resolution.
Myth: you can’t edit or color grade JPG files
You will hear many (professional) photographers swear that it’s impossible to edit JPEG files. That’s simply not true. It’s entirely possible, but you have less color and exposure information available. You’ve probably already noticed that photos taken with your phone are easily editable on your smartphone, but there’s a limit. If you take a JPEG photo with one of the best cameras, it’s still possible to edit it. Of course, you might wonder; why? But that’s a different discussion.

A heavily edited JPG photo with Sky Replacement and color correction. My point: it’s entirely possible with JPG images. Photo: Yoreh Schipper / Camera Deals
If you really want to edit with JPG’s, make sure you create the highest quality JPEG. This means the highest resolution and the sharpest version. For example, 7000 × 5000 pixels and ‘high’ or ‘extra fine’ as a quality setting.
Use a good monitor with natural colors
When you start photo editing on a desktop, you don’t immediately need to buy the best color calibrated screen, but you must set the screen correctly. Make sure you don’t have anti-blue or other filters turned on. If they are on, you are editing based on a filter and the image will look different than you think. Ensure the screen is set to standard and that contrasts and lighting have been reset. Furthermore, look at the software on the computer and ensure it is turned off when opening a photo editing program.
Did you still edit while a (screen) filter is on? Don’t worry, it happens to me often enough. Just go back to the editing program and adjust the editing if necessary.
The best free photo editing programs
Before you spend money, you can start with a free photo editing program, and luckily, there are many. Below is a list of the best desktop programs for editing your photos, in no particular order:
- Canva: Good for adding graphic work
- Web/Mac/Windows
- No AI
- Free | Premium available
- MyEdit Image Editing Tool: Online and without login
- Web
- AI capabilities
- Free | Premium available
- Fotor: Good for color editing
- Web/Mac/Windows
- AI capabilities
- Free | Premium available
- Pixlr: Easy to use for beginners
- Web/Windows
- AI capabilities
- Free | Premium available
- BeFunky: Easy and fast editing
- Web
- AI capabilities
- Darktable: For the more professional editor and photographer
- Windows/Mac/Linux
- No AI
- Digital Photo Professional (4) by Canon: Edit RAW photos with this. Professional and free program similar to Adobe Lightroom.
- Windows/Mac
- Can edit RAW files
- Free
- PhotoDirector Essential: Free trial, then paid
- Windows/Mac/Linux
- No AI
- Free trial | Premium available
- PhotoPad: For reframing photos
- Windows/Mac
- AI capabilities
- Ashampoo Photo Optimizer
- Windows
- AI capabilities
- Paint.net: For working with multiple layers (yes, that Paint)
- Windows
- AI capabilities
- Photo Pos Pro: Good for adding text
- Windows
- AI capabilities
- Adobe Express: Good for social media, different from Photoshop
- Web
- AI capabilities
- Movavi Photo Editor: Easily remove objects with this tool
- Windows/Mac
- AI capabilities
- InPixio Photo Studio
- Windows/Mac
- AI capabilities
- GIMP: More advanced
- Windows/Mac/Linux
- No AI
- Photopea: Good Photoshop alternative for advanced users
- Web
- No AI
Freemium
Please note that some of these programs operate on a freemium model, which means you have to pay for additional features. Some programs, such as MyEdit Image Editing Tool, are available online only. This can be both an advantage and a disadvantage, depending on what you need.
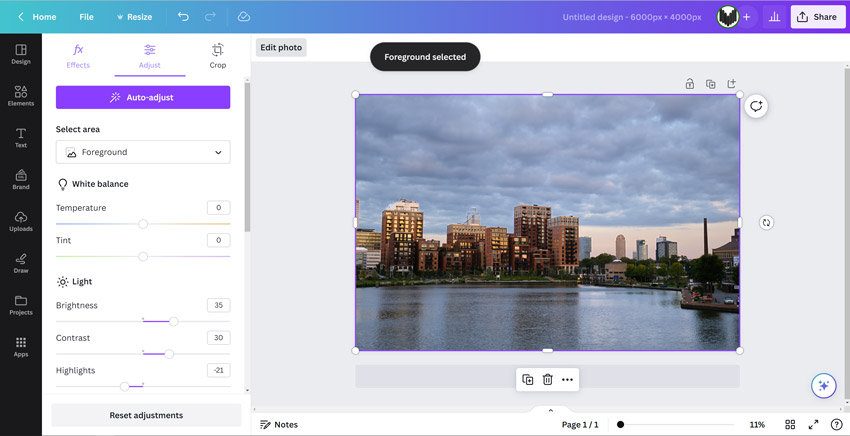
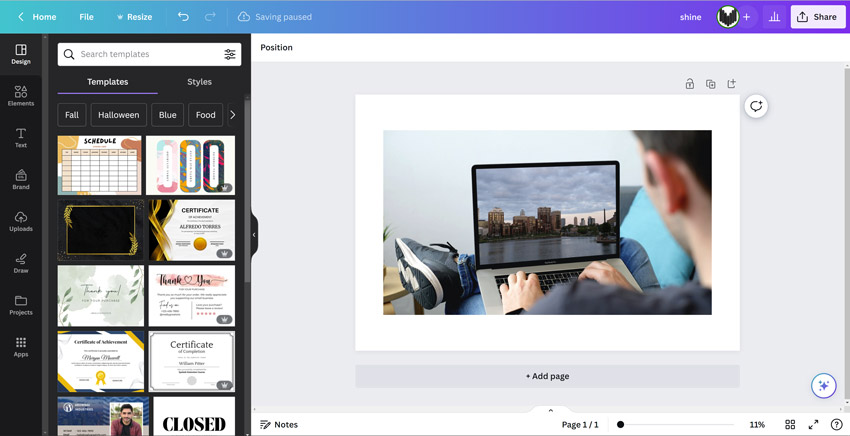
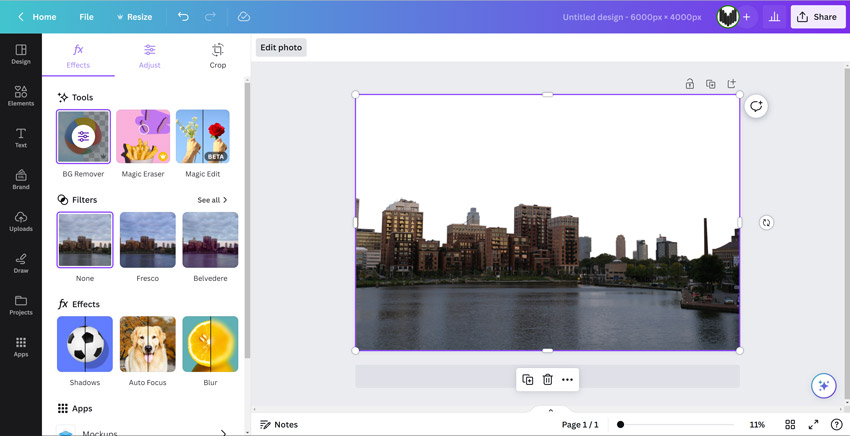
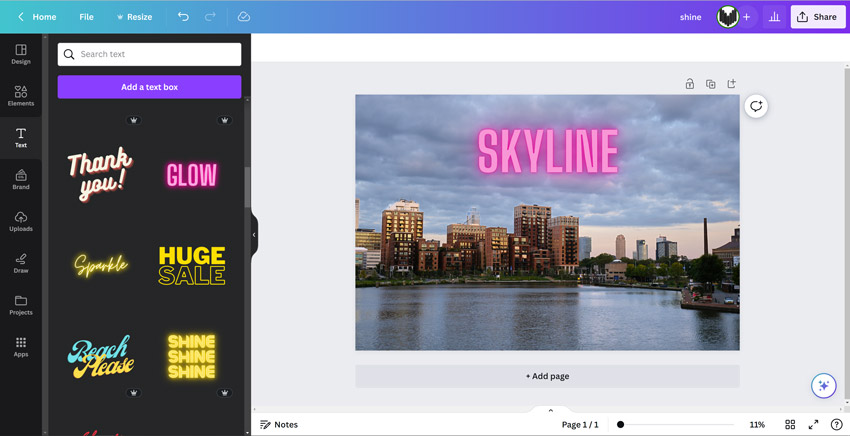
Below is an example of the free program Canva (freemium) where you can edit photos with a (free) account. From highlights and shadows to removing backgrounds and adding attractive texts. Even creating a ‘mock-up’ is freely available. This shows how a certain image would look on a laptop or phone. Canva is available for both mobile and desktop, just like Photoshop Express.
Paid Photo Editing Software
When do you switch to a paid editing program? Once you have mastered the free programs, and you really want to delve deep into photo editing, it might be time for a paid program. You can even choose never to edit anything yourself and opt for, for example, Adobe Firefly (paid), to have the photo edited based on AI.
(text continues below the photo)
A professional program often allows you to deeply engage with all secondary or even tertiary colors. Also, noise reduction, lens correction, lens profiles, and AI technology are better in paid programs. Of course, the ability to edit RAW images is crucial if you want to work professionally. This is not possible with every free program.
AI Capabilities
In Photoshop, it is possible to select a part and replace it with whatever you want. With a click of a button, you can also realistically change the skies. But even free tools offer this. The Sky Replacement feature, for instance, is also available in the free program PhotoDirector.
Photo Editing Software FAQ (Frequently Asked Questions)
What are the advantages of a free photo editing software?
Besides the main advantage of being free, with free software, you can start slowly and see if it’s the right tool for you. For standard and sometimes even advanced editing, a free tool is more than sufficient.
What are the disadvantages of a free photo editing software?
A disadvantage of free photo editing software can be that over time you may find the program lacks features you desire. If you’re already accustomed to its interface, it can be inconvenient to switch to another program. It might also be that the photo software has a maximum resolution limit and cannot always work in layers.
What should I look for in a new photo editing software?
First, look at the software’s interface; the menu, the buttons. While it may appear simple or complex, this might not always be the case. Moreover, consider what you want to achieve with the program and see if those features are included. It would be a waste to master the software only to find out it can’t do everything you need.
Also, consider the following aspects:
- Can you manually adjust colors and contrasts with buttons?
- Is it user-friendly?
- Are there pre-installed filters available?
- Can you work in layers?
- Are there AI capabilities like selecting and editing or replacing the sky or subjects?
- Are there light effects?
- Are there color effects?
- Can you determine the resolution and frame yourself?
- Can you edit RAW images?
When should I switch to a paid photo editing software?
If you want to use a paid program like Adobe Lightroom or Photoshop, only do so if you are really investing a lot of time in your images. Programs like these have advanced AI features for noise reduction, RAW file editing, and a deep dive into color and contrast.
Is there a free version of Photoshop?
No, Photoshop does not offer a free version. However, there is a 7-day trial, after which a monthly fee is required.
Which photo editing software is truly free?
For a photo editing software that is completely free, check out MyEdit. This is an online program, so you don’t have to install anything.


